Installing Linux on most Windows PCs is a fairly straightforward process, you just insert the disk or plug in the USB stick and you follow the on-screen instructions, on Macs things are a little bit more complicated. The reason is most PC models from most manufacturers use BIOS, machines using UEFI are more and more common everyday, but for the most part they don’t pose too much of a hassle, things are a little different with Apple and is very custom EFI that doesn’t comply with the official specification. Installing versions of any distribution prior to Linux 3.11 will result on unnecessary frustration, as such, of the Ubuntu family and friends, only 13.10-based distributions should considered, in this particular will be installing Kubuntu 13.10.
A Bug in Kubuntu
The current version of Ubuntu 13.10 boots into EFI-mode automatically and it also installs grub-efi by itself, all Ubuntu 13.10 derivates are supposed to behave in this fashion, however, Kubuntu seems to be affected by a bug and the installation of grub-efi fails with one of these two very dramatic messages:
“grub install dummy failed” This is a fatal error.
“Failed to install grub-efi to /target/ the system will not boot”
There may be other variants, but don’t worry, despite the rather dark claim of “fatal error” this can be fixed. Before getting to that point, we should start by making a few preparations.
Make space
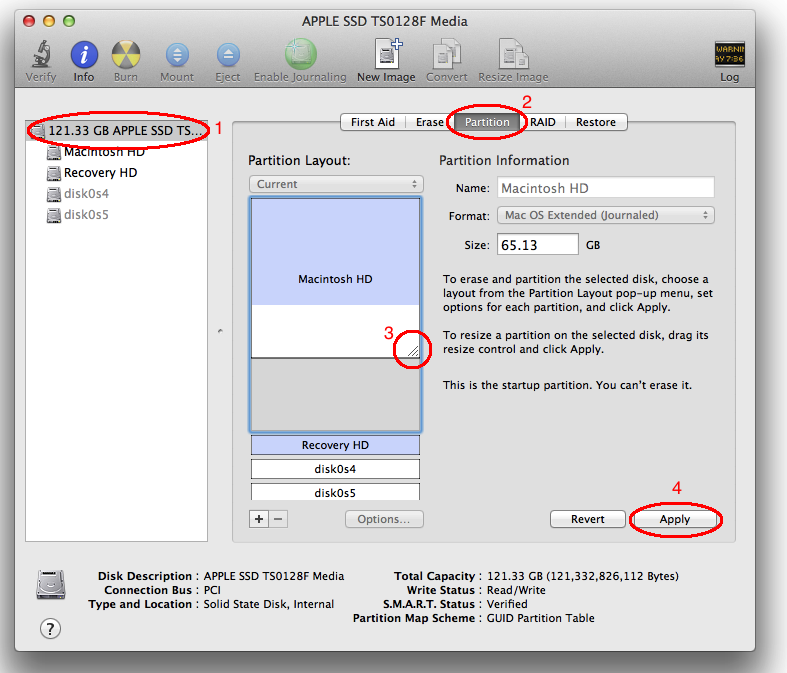
Usually you can count on the installer’s partitioner to take care of this step, however, Apple doesn’t use MBR (Master Boot Record) and so you won’t be able to resize Mac OS X’s partitions the usual way. But worry not, this can be trivially done on OS X by opening Disk Utility , you can use spotlight to find it, and going to Drive > Partition and dragging (or writing) the desired size and hitting apply. This operation isn’t easy to reverse, make you sure you leave OS X with enough space if you still plan on using it regularly.
You can probably accomplish this from the live session by installing a few command line tools. Is just doing so from Mac OS X is way easier and way less risky.
Install rEFIt
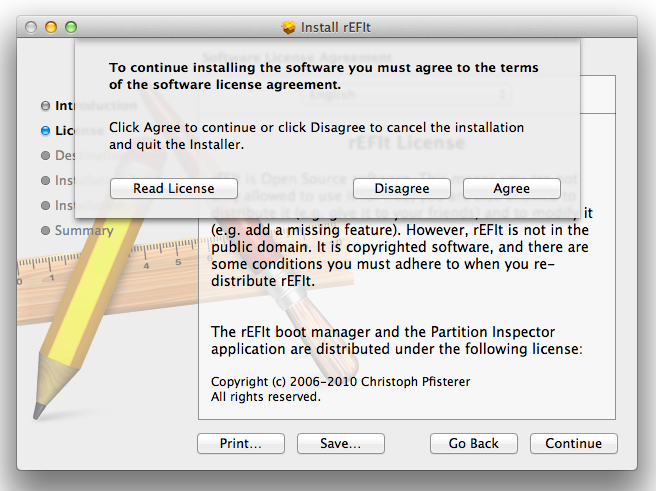
You can think of it as GRUB’s sibling, it will let you pick among different operating systems when you turn on your Macbook Air, the interface is easy to understand, although the icons look severely outdated you can replace them, if you really care about it. rEFIt is no longer maintained and a fork goes by the name of rEFInd, but in my experience rEFInd causes a few bugs, not mention the installation process is very inelegant. You can get rEFIt from here, after the download is finished open the dmg file. If you try to run the installer you will be warned about it being from a unknown developer, you don’t need to turn off Apple’s security measure, instead use the secondary click (tap with two fingers by default, or regular click while holding ctrl) and select open, the installer should run, click continue and agree with the terms to install rEFIt.
A small caveat
Here you have two options, you can install Ubuntu 13.10 instead of Kubuntu 13.10 and then add Kubuntu by executing:
sudo apt-get install kubuntu-desktop
and avoid having to repair GRUB (but in exchange you will need to download a bunch of packages) or install Kubuntu and repair it. Aside from the last part the installation process is identical, so the following instructions can be applied to either method.
Installing Kubuntu
Plug the USB containing Kubuntu and restart your Macbook, after it shuts down press and hold any of the alt keys. There will be three options, the last one (from left to right) is your USB stick (it has a different orange icon), select it by clicking on it or by using the keyboard.
Kubuntu will ask if you want to go try it first or if you want to install it, my personal recommendation is picking to try it first so you can fool around while the installation process finishes. Either way, once you run the installer follow the on-screen instructions, remember to select that you want to install third party drivers. Is worth noting at this point that sometimes WiFi works, sometimes it doesn’t (it automatically loads the proprietary driver when it offers you to pick a network), hopefully it will work.
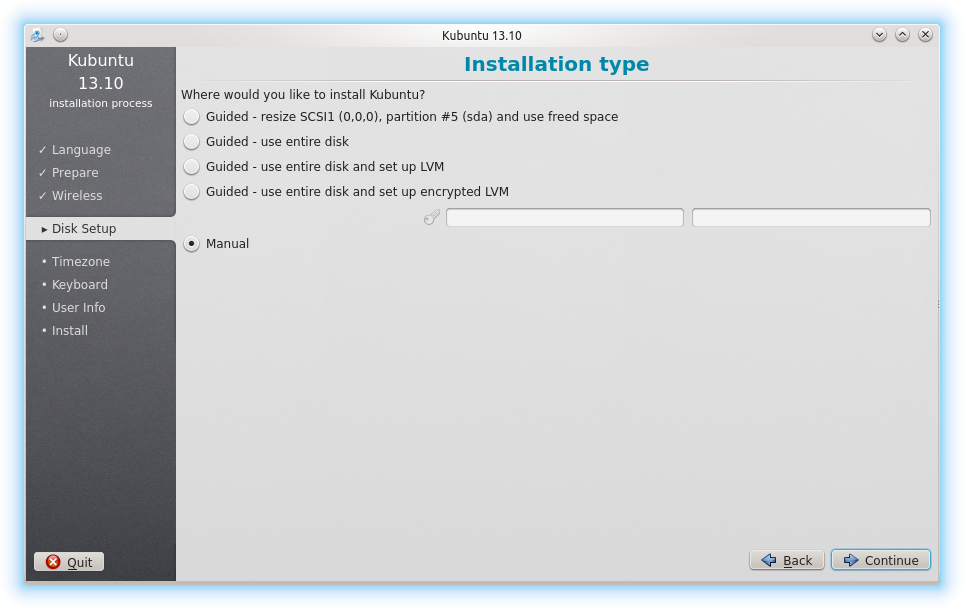
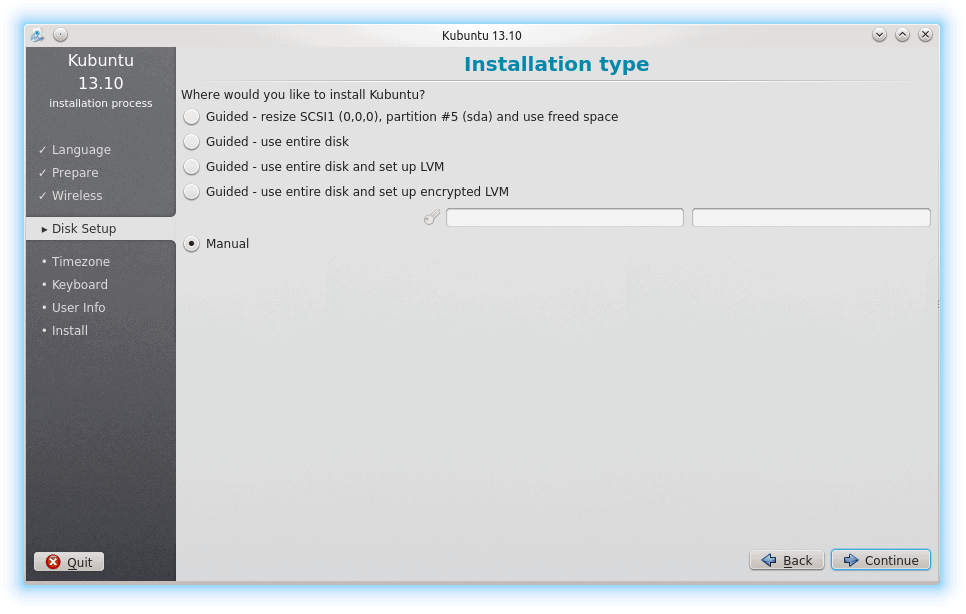
Once you get to decide how and where in your hard drive to install Kubuntu pick Manual.
At the very least you need to do the following: First make a new 4GB partition and select SWAP, then create another one with the rest of space, pick EXT4, and set the mount point to
/
I personally prefer to keep home and root (/) separated, this method has the advantage that if you ever want to install a new distribution from scratch you won’t need to erase your personal files, to accomplish this create the same SWAP partition with 4GB, create a new EXT4 partition 10GB to 20GB long (depending on how many apps you plan to install) and set the mount point to
/
And finally create another EXT4 partition with the rest of the available space and set its mount point to
/home
Bare in mind that the first method works just fine too, it’s up to personal preference. Now change the bootloader location from /dev/sda to the partition you mounted / to, if you followed this exact instructions that partition should /dev/sda5. Then you can proceed, enter your data as usual and wait until it finishes.
If you went with Ubuntu
If you decided to go with Ubuntu instead of Kubuntu, you’re ready to boot into it, reboot your computer and rEFIt should let you choose it (there’s more than one option, and all of them work), if you don’t see rEFIt don’t panic you just need to reboot your computer again, sometimes before rEFIt appears you will have to reboot your Mac a few times, this is one time only thing, once in Ubuntu do as described above, log out, pick KDE, and that’s all.
If you went with Kubuntu
You got a terrifying error message, but thankfully we can fix it right on the spot. Kubuntu’s problem seems to be not being able to install grub-efi (I think the installer fails to switch from grub-pc to grub-efi), this solution, although it’s a little bit cumbersome (there may be other ways, this is what I came up with), works perfectly. Fire up the terminal and run the following commands, replace the x with the number of the partition you picked to mount / to:
1. sudo mkdir /mnt/kubu
2. cd /mnt/kubu
3. sudo mount /dev/sdax /mnt/kubu
4. sudo mount -o bind /dev /mnt/kubu/dev
5. sudo mount -t proc proc /mnt/kubu/proc
6. sudo mount -t sysfs sys /mnt/kubu/sys
7. sudo mount –bind /etc/resolv.conf /mnt/kubu/etc/resolv.conf
8. sudo chroot /mnt/kubu
What we’ve done is create a chroot environment, now we just need to install grub-efi:
1. sudo apt-get install grub-efi
2. sudo grub-install /dev/sdax
3. sudo update-grub
4. exit
And done. Reboot your computer and rEFIt should let you boot into Kubuntu.
What about Netrunner?
While is possible to get a functional installation of Netrunner 13.06, it is a bit trickier because to get a truly usable system its necessary to change the kernel, my personal recommendation is to wait until the next version is available.
I don’t like rEFIt
If you don’t like rEFIt there’s a more complicated method to install Kubuntu omitting it, the problem is you will need to hold the alt key every time you turn on your computer, I don’t personally think is worth it, but if somebody really wants to do it that way leave a message and I’ll write the tutorial.
Anyway, I hope you enjoy Linux on your Macbook Air, if you encounter any issues leave a comment and I will try to help you.
[sharedaddy]
Thanks for the tutorial. It would be great if you could write a version without rEFIt. I plan to install linux on an external usb drive so I don’t mind pressing the alt key when I want to boot it up.
Luis, a thousand thanks. After several unsuccesfull attempts I could finally get Kubuntu running on my macbook with this tutorial. You really saved my day.